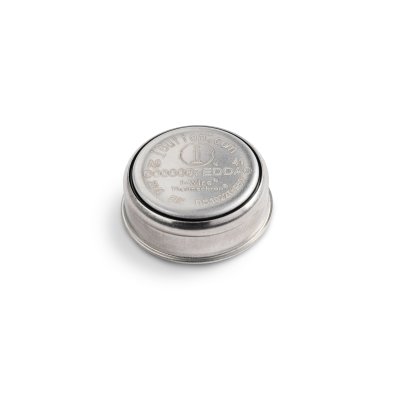


For less demanding applications where ±1.0°C accuracy is acceptable. Temperature range of -40°C...+85°C.
Add to Favourites
Please use waterproof enclosures if the product is to be submerged in liquid.
Alternatively we would recommend using fully waterproof loggers – LIB22T and LIB22L
Want to learn more? Check out our FAQs section for detailed guidance on using the micrologger, including setup, best practices, and troubleshooting tips.
The logger can be used in following applications:
- Temperature checks during transport.
- Temperature monitoring and validation in cooking applications.
- Monitor cooling curves.
Software:
| Accuracy | ±1.0°C | Alarm | Max/Min points |
|---|---|---|---|
| Battery life | Up to 8 years | Dimensions (mm) | 17.35mm |
| IP rating | IP65 | Measuring range | -40.0...+85.0°C |
| Memory | 2048 samples | Operating Ambient (Temperature) | -40.0...+85.0°C |
| Resolution | ± 0.5°C | Sampling rate | 1...255 minutes |
| Sensor | Thermister | Software | SOLO (1 logger), CINCO (2-5 loggers), PRO (6+ loggers) |
| Calibration Included | No | Temperature points | -40° & 85°C - Budget |
| Application | Production Chill chain distribution Ambient distribution Logistics |
|---|
Software
Missioning a Micrologger
The term 'mission a micrologger' means to start the micrologger, ready for either its first or next round of data collection. Parameters will vary depending on the type of micrologger you are using. That is why the first step is always to place the micrologger onto the reader for a direct missioning. Once you have carried out a full direct mission, you will be able to choose from three methods.
Direct Missioning
As mentioned above, you will always need to start the process by placing your Micrologger onto the reader for a Direct Missioning. Once you have done this, you will need to click the 'Mission' icon, then choose 'Prepare' from the list of options. This will cause three tabs to appear on your screen: General, Temperature, and Memory. You will need to work through each of the three tabs, entering in the relevant values.
The General Tab
This is where you will select information such as the time and date for the mission to start, the sample rate, and whether or not the memory of your Micrologger rolls over.
The Temperatures Tab
In this tab, you can specify high and low temperature thresholds. During the data logging period, if the temperature falls outside of these thresholds, an alarm will be logged. You can also specify a temporisation for these alarms, so they are colour-coded to reflect how long the temperature sat outside the threshold.
The Memory Tab
The Micrologger has an internal memory that allows you to store the information you want to assign to each mission. This information can also be used to create automatic archive names.
Relaunching an Existing Mission
To relaunch the mission of a Micrologger, it is simply a case of clicking on the 'Mission' icon, then selecting the 'Relaunch a Mission' option. This will allow you to relaunch without having to re-enter all the parameters.
Missioning Using Profiles
If it is likely that the parameters of your mission will be repeated, you could save time and effort by creating a mission profile. Then, whenever your team needs to carry out a round of data collection using the same parameters, they can simply select the pre-prepared profile. This can be done multiple times to reflect a wide range of parameters.
Creating a Profile
To create a profile, you will need to click the 'New' button, then enter a profile name, an author, and a comment. Next, you will need to select the type of Micrologger that will be used for this profile. This will activate any functions that are specific to certain types of Microloggers.
In each of the three tabs: General, Temperature, and Memory, enter the relevant values. This will include the start conditions, sample rate, and thresholds. Then, click 'Save'. Once your profiles have been created and you have opened up the Thermotrack Software, you will need to click the 'Mission' icon. Next, from the list of options, select 'Prepare from a profile'. The final step is to select the relevant profile from the options in the list, and use the arrows to copy across the profile parameters.
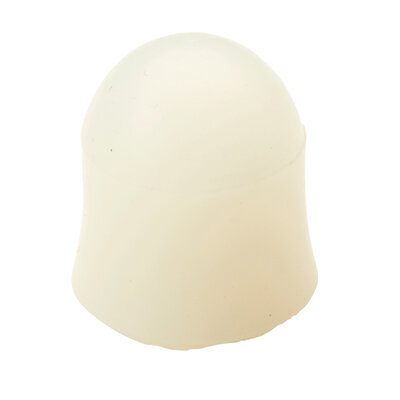
If you are using a standard micrologger, placing it inside a waterproof capsule will afford extra protection against heat and moisture. Alternatively, if you are monitoring a high humidity application such as a wash cycle, you may decide to use a waterproof micrologger.
After you have missioned your micrologger, you will need to place it safely inside the product or package you wish to monitor. Once the application is complete, remove the logger from the product or package it has been placed inside.
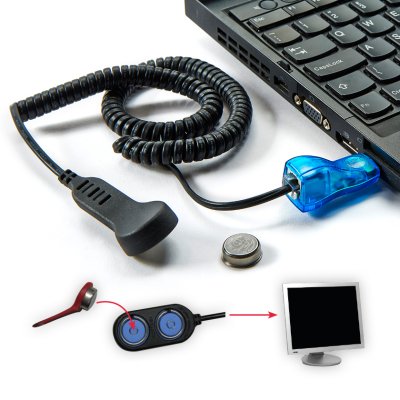
The Thermotrack Software should have been downloaded onto your PC. Open it and click the 'Download' button. Connect the micrologger to your PC using an interface clamp for a waterproof micrologger or a key fob reader for a standard logger.
Once you have downloaded the software, it is simply a matter of pressing the 'Download' button and placing your Micrologger on the reader. You will then see a window featuring the following tabs:
The Status Tab
Here you will find information such as the serial number of your Micrologger, the mission status, the number of samples since the mission started, the number of samples since the Micrologger was first started, plus the high and low thresholds with temporisations.
The Alarms Tab
This window tells you if the pre-selected alarm and temporisation thresholds have been exceeded throughout the course of the mission. Each alarm has a start and an end, with the time in between known as a period. Your Micrologger can store up to 12 high and low alarm periods. For each period, the Micrologger records the total time and average temperature. The Thermotrack Software will also calculate the total time for all alarms.
If the alarm shows up in red or blue, this corresponds to the values that exceed the alarm and temporisation thresholds. If it shows up in orange, it corresponds to the values that exceed the alarm thresholds, but not the temporisation thresholds. If you enabled the roll-over feature, some periods may display N/A for the average temperature.
The Temperatures Tab
Here you will find the temperature log for your Micrologger. The red lines correspond to temperatures below the pre-selected low threshold and the blue lines correspond to the temperatures above the pre-selected high threshold. You can click the column headers to sort the values accordingly.
The Graphs Tab
This tab displays a graph of the data gathered by your Micrologger. You will be able to perform the following functions:
- Using the zoom window, you can zoom in on a specific period.
- Using the email icon, you can send an image of the graph directly.
- Using the data points button, you can choose whether or not the data points are displayed.
- You can add labels to the graph.
The Notepad Tab
In this tab, you can create and attach a report to the mission. You can include your choice of text, tables, and images. By right-clicking on the alarm table and selecting 'Copy,' you can copy the table over to the Notepad window. You can also copy over the graph using the insert button.
Archive, Export, and Print
You have the option of clicking the 'Archive' button if you want to archive the temperature data from your Micrologger. Using the 'Export' button, you can also export the temperature log into Microsoft Excel. Finally, you can select the 'Print' button if you want to print the alarm listing, temperature list, graph, and notepad.